Key takeaways
- Buying based on maximum dB alone. An interface listed at 60 dB is not automatically better than one listed at 55 dB. What matters is whether it stays quiet and provides enough level for your particular microphone and distance.
- Keeping the microphone too far away. Moving from 3 inches to 12 inches (7.6 to 30.5 cm) greatly increases the gain requirement and captures more of the room.
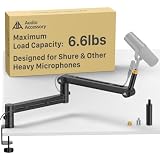
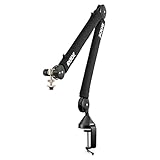
- Using a weak boom arm with a heavy mic. Check mic weight, shock mount weight, and cable load together. A 2.1-pound mic can exceed the real-world comfort limit of a budget arm.
- Forgetting XLR connector clearance. A rear-facing XLR cable can add 2 to 3 inches (5.1 to 7.6 cm) behind the mic body. Measure the full assembly, not just the microphone.
- Sending phantom power directly to a mic without checking. Standard dynamic XLR microphones do not need phantom power. An in-line booster may require 48V phantom power, so follow its connection instructions.
- Trying to fix low level only in software. Digital gain can raise room hiss along with your voice. Improve mic placement and preamp gain first.
What's inside
The Short Answer
Most dynamic XLR microphones need an audio interface with about 50 to 60 dB of usable microphone gain for close-up speech, streaming, podcasting, and voice-over work. Low-output broadcast-style dynamics may need 60 to 70 dB, especially if you speak softly, sit more than 4 to 6 inches from the microphone, or record at conservative digital levels.
A dynamic XLR microphone does not use a fixed amount of gain. The right setting depends on the mic’s sensitivity, your voice volume, your mouth-to-mic distance, room noise, and the interface’s preamp design. In practical terms, a typical dynamic mic should produce healthy speech peaks around -12 dBFS to -6 dBFS in your recording software without forcing the interface gain control all the way to maximum.
As an Amazon Associate we earn from qualifying purchases at no extra cost to you. Product prices and availability are accurate as of the date shown and are subject to change.


If your interface has only 40 to 50 dB of gain, or becomes noisy near its highest setting, an in-line preamp can help. Products such as the Coda MB-Stealth and Bolanle NK1 add approximately 28 dB of clean gain and require 48V phantom power from the interface. They do not send phantom power into the dynamic microphone itself. For 2026 buyers, the most useful specification is not simply maximum gain: look for enough quiet, usable gain for your normal speaking distance.
Standard Sizes
“Size” matters in a microphone setup because the microphone, boom arm, desk stand, interface, cable bend, and speaker position all compete for room on a desktop. The table below covers common physical dimensions and gain ranges for a practical dynamic XLR recording station.
| Component or Measurement | Typical Size in Inches | Typical Size in Centimeters | Buyer Guidance |
|---|---|---|---|
| Broadcast dynamic microphone body | 6 to 8.5 in long; 2 to 2.5 in diameter | 15.2 to 21.6 cm long; 5.1 to 6.4 cm diameter | Allow extra clearance for the rear XLR plug and cable. |
| RØDE PodMic | 6.8 in long; 4.3 in wide | 17.2 cm long; 10.9 cm wide | This cardioid XLR dynamic mic weighs about 2.1 lb (937 g), so it needs a sturdy arm or stand. |
| Dynamic mic with built-in USB/XLR connection | About 7 to 8.5 in long | About 17.8 to 21.6 cm long | Models such as the FIFINE AmpliGame AM8 combine USB convenience with an XLR output. |
| Compact desktop audio interface | 5 to 8 in wide; 4 to 6 in deep; 1.5 to 3 in high | 12.7 to 20.3 cm wide; 10.2 to 15.2 cm deep; 3.8 to 7.6 cm high | Reserve space for knobs, headphone plugs, and rear cables. |
| In-line XLR preamp | About 4 to 5.5 in long; 0.75 to 1 in diameter | About 10.2 to 14 cm long; 1.9 to 2.5 cm diameter | Adds length and weight at the microphone cable connection. |
| Desk-stand footprint | 5 to 7 in diameter | 12.7 to 17.8 cm diameter | Best for a dedicated recording surface with no keyboard movement. |
| Boom arm reach | 25 to 35 in | 63.5 to 88.9 cm | Choose the longer range for deep desks, ultrawide monitors, or sit-stand desks. |
| Recommended mouth-to-mic distance | 2 to 6 in | 5.1 to 15.2 cm | Closer placement needs less gain and captures less room noise. |
| Usable interface gain for most dynamic mics | 50 to 60 dB | 50 to 60 dB | Aim for this range before deciding that an external booster is necessary. |
Many entry-level USB/XLR dynamic microphones sell around $50 to $90. A dedicated XLR broadcast dynamic mic commonly falls around $80 to $200, while a simple 28 dB in-line gain booster is often $25 to $60. A single-input interface with 55 to 70 dB of advertised gain usually costs roughly $100 to $250, depending on connections and included software.
How to Measure Your Space
- Measure the usable desk depth. Measure from the front edge of the desk to the monitor stand, not just to the wall. A compact setup can work with 20 inches (50.8 cm) of clear depth, but 24 to 30 inches (61 to 76.2 cm) is more comfortable for a keyboard, interface, and boom arm.
- Mark your speaking position. Sit where you normally work and mark a point 2 to 6 inches (5.1 to 15.2 cm) from the corner of your mouth. This is the microphone’s target position, not the center of the desk.
- Check boom-arm mounting clearance. Most clamp mounts need a desk edge about 0.4 to 2.4 inches (1 to 6 cm) thick. Measure underneath the desktop as well, because drawers, metal rails, and cable trays can block the clamp.
- Measure vertical clearance. A boom arm can sit above a monitor, beside it, or below its lower edge. Leave at least 3 inches (7.6 cm) around the microphone so you can adjust its angle and remove the XLR connector.
- Plan cable length. Measure the route from mic to interface rather than buying based on straight-line distance. A 6-foot (1.8 m) XLR cable suits a compact desk; 10 feet (3 m) is more flexible for a boom arm or floor stand.
- Place the interface within arm’s reach. Keep its gain knob and headphone jack within roughly 18 to 24 inches (45.7 to 61 cm) of your seated position. You should be able to adjust gain without leaning across the desk.
- Leave a quiet zone behind the microphone. A cardioid dynamic microphone rejects more sound from the rear. Point its back toward a computer fan, open room, or loud speaker whenever possible.
By Room or Use Case
Small Desk or Bedroom Setup
For a desk under 48 inches (122 cm) wide, a compact USB/XLR dynamic microphone is often the easiest fit. The FIFINE AmpliGame AM8, typically priced near $57, can be used by USB immediately and later connected by XLR to an interface. If using its XLR output, plan on an interface providing at least 55 dB of gain. Mount the mic on a 25- to 30-inch (63.5- to 76.2-cm) boom arm and keep it 3 to 4 inches (7.6 to 10.2 cm) from your mouth.
Podcast or Voice-Over Desk
A heavier broadcast microphone such as the RØDE PodMic, commonly around $86, benefits from a substantial boom arm rated for at least 2.5 pounds (1.1 kg). Its 2.1-pound (937 g) weight can make lightweight arms sag. Start with the microphone 2 to 4 inches (5.1 to 10.2 cm) from your mouth, slightly off to one side to reduce plosive sounds. A 60 dB interface is a comfortable target; an interface with lower clean gain may need a 28 dB booster.
Gaming and Streaming Setup
Gamers often place the microphone farther away to keep it out of the camera frame. That choice requires more gain and lets in more keyboard, fan, and room sound. Instead, bring the mic to within 4 to 6 inches (10.2 to 15.2 cm), position it just below eye level, and use a boom arm from the side. Keep the mic away from the keyboard’s direct path. If your interface knob sits near full gain and your voice remains quiet, an in-line preamp is more effective than increasing software gain after recording.
Shared Room or Untreated Space
A dynamic cardioid microphone is a sensible choice in a shared office, living room, or bedroom because close placement reduces the need for extreme interface gain. Do not assume a dynamic mic removes all background noise; it mainly favors nearby sound. Use 50 to 60 dB of interface gain, keep the mic 2 to 3 inches (5.1 to 7.6 cm) from your mouth, and place soft furnishings behind and beside you where possible. A rug, curtains, upholstered chair, and bookcase can make a more meaningful difference than buying a larger microphone.
Common Sizing Mistakes
- Buying based on maximum dB alone. An interface listed at 60 dB is not automatically better than one listed at 55 dB. What matters is whether it stays quiet and provides enough level for your particular microphone and distance.
- Keeping the microphone too far away. Moving from 3 inches to 12 inches (7.6 to 30.5 cm) greatly increases the gain requirement and captures more of the room.
- Using a weak boom arm with a heavy mic. Check mic weight, shock mount weight, and cable load together. A 2.1-pound mic can exceed the real-world comfort limit of a budget arm.
- Forgetting XLR connector clearance. A rear-facing XLR cable can add 2 to 3 inches (5.1 to 7.6 cm) behind the mic body. Measure the full assembly, not just the microphone.
- Sending phantom power directly to a mic without checking. Standard dynamic XLR microphones do not need phantom power. An in-line booster may require 48V phantom power, so follow its connection instructions.
- Trying to fix low level only in software. Digital gain can raise room hiss along with your voice. Improve mic placement and preamp gain first.
FAQ
Is 50 dB of interface gain enough for a dynamic XLR microphone?
It is often enough when you speak at a normal volume from 2 to 4 inches (5.1 to 10.2 cm) away. For quiet voices, distant placement, or lower-output broadcast dynamics, 60 dB or more is more comfortable.
Do I need a Cloudlifter-style in-line preamp?
Not necessarily. First test the microphone close to your mouth with the interface gain set normally. If you must run the gain nearly all the way up and recordings are still too quiet or noisy, a 20 to 28 dB in-line preamp is a practical upgrade.
Does a dynamic microphone need 48V phantom power?
Most conventional dynamic XLR microphones do not need it. However, an in-line gain booster such as a 28 dB preamp may require 48V from the interface to operate. Consult the booster’s instructions before switching phantom power on.
What is the best distance between a dynamic microphone and my mouth?
For most speech recording, 2 to 6 inches (5.1 to 15.2 cm) is the useful range. Start at 3 to 4 inches (7.6 to 10.2 cm), speak slightly across the microphone rather than directly into it, and adjust gain so your loudest speech peaks remain below clipping.