Our Top Picks
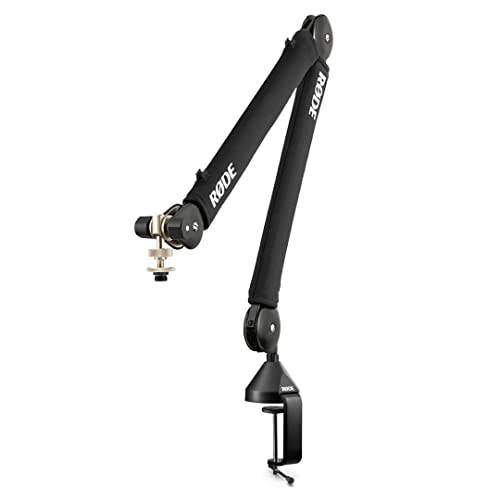 RØDE PSA1+ Professional Studio Boom Arm with Spring8.25" W x 21.25" L x 3.25" H21.25 x 8.25 x 3.25 inches3.4 poundsCheck on Amazon
 FIFINE BM88 Low Profile Microphone Boom Arm StandLow Profile (BM88 Black)13 x 11.6 x 4.1 inches2.9 poundsCheck on Amazon
The best podcast microphone arm is one whose rated load range covers your microphone plus its shock mount and cable, with 20–30% to spare. For most podcasters that means the Rode PSA1+ for mics up to about 1.2 kg, or the Elgato Wave Mic Arm LP or Gator Frameworks Deluxe GFWMICBCBM3000 for heavier mics up to 2 kg. The Heil PL-2T remains a durable broadcast-style choice for mid-weight dynamics. Choose by weight first, then by profile (low vs overhead) and reach. A cheap arm sags with a heavy dynamic mic no matter how tight you crank the knobs.
Step 1: Add Up Your Real Payload
Podcast mics are heavy, and the shock mount, pop filter and cable add more weight than people expect. Here are typical totals:
RØDE PSA1+ Professional Studio Boom Arm with Spring Damping, Black | Fits mics 0.25 to 1.2kg with 360 degree rotation, silent spring operation and internal cable management for podcast desks
Chosen because it specifies Black and Fits mics 0.25 to 1.2kg with 360 degree rotation.
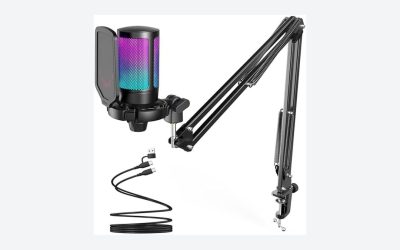
View on AmazonFIFINE BM88 Low Profile Microphone Boom Arm Stand for Gaming Streaming | Adjustable Stick Stand, Desk Mount Clamp, Cable Management, Screw Adapter, for Podcast Streaming Gaming
Chosen because it specifies Adjustable Stick Stand and Desk Mount Clamp.
View on Amazon
FIFINE BM66 Heavy Metal Microphone Boom Arm Stand for Podcast Recording | Mic Arm Stand,Desk Clamp, Cable Channels, 3/8" to 5/8" Threads, for Podcast, Vocal Recording, Gaming
Chosen because it specifies Mic Arm Stand and Desk Clamp.
View on Amazon
TODI Mic Arm for Lightweight Mics, Microphone Arm Rotatable, Storable Desk Mic Stand for Bear 3LB with Mount Clamp, Mic Stand Boom Arm with Cable Channel with 3/8'' 5/8'' Thread for Podcast, Gaming
Chosen because it specifies Microphone Arm Rotatable and Storable Desk Mic Stand for Bear 3LB with Mount Clamp.
View on Amazon| Microphone | Mic weight (approx.) | Typical accessories | Total payload |
|---|---|---|---|
| Shure SM58 | 300 g | Clip + XLR cable ≈ 150 g | ≈ 450 g |
| Shure SM7B | 765 g | Built-in yoke, XLR cable ≈ 120 g | ≈ 885 g |
| Electro-Voice RE20 | 735 g | Shock mount ≈ 300–450 g, cable ≈ 120 g | ≈ 1.15–1.3 kg |
| Rode PodMic | 935 g | Built-in yoke, XLR cable ≈ 120 g | ≈ 1.05 kg |
| Large-diaphragm condenser with shock mount | 500–800 g | Shock mount + pop filter ≈ 250–400 g | ≈ 0.8–1.2 kg |
Spring arms work best in the middle of their range. An arm rated 0.1–1.2 kg holding 1.15 kg may technically hold the mic, but it will drift downward once the springs relax over a few months. Aim to keep your payload at 70–80% of the rated maximum.
Four Arms Worth Buying
| Arm | Rated load | Style | Cable management | Mount | Typical price |
|---|---|---|---|---|---|
| Rode PSA1+ | 0.094–1.2 kg | Overhead, spring with damping | Channels along the arm | Desk clamp + insert | $100–$130 |
| Elgato Wave Mic Arm LP | Up to 2 kg | Low-profile, stays below eye line | Internal channels | Desk clamp | $90–$130 |
| Gator Frameworks GFWMICBCBM3000 | Up to 2 kg, about 940 mm reach | Overhead broadcast | Integrated XLR cable | Desk clamp | $90–$130 |
| Heil PL-2T | Up to about 2.5 lb (1.1 kg) | Overhead broadcast, internal springs | Internal cable path | Clamp or flange | $110–$150 |
Which Arm for Which Podcast Setup
Rode PSA1+: best for light and mid-weight mics
The PSA1+ adds internal spring damping to the classic PSA1 design, which removes most of the spring “twang” that cheaper arms pass into a sensitive condenser. It moves smoothly, holds its position, and rotates a full 360° on its base so you can swing it from host to guest. It’s rated up to 1.2 kg, so it handles an SM7B or a lighter condenser easily. With the heaviest broadcast mics plus a big shock mount, you’ll be at its limit.
Elgato Wave Mic Arm LP: best low-profile arm
The LP keeps the arm low and to the side, so it doesn’t block your face on camera. That matters for video podcasts. Its 2 kg rating handles heavy dynamics comfortably, and the cable runs through hidden channels. The tradeoff is that a low arm suits a mic positioned in front of your mouth from below. If you lean back or stand, an overhead arm gives more freedom.
Gator Frameworks Deluxe GFWMICBCBM3000: best for long reach and heavy mics
Gator’s deluxe broadcast arm combines a 2 kg rating with about 940 mm of reach and a pre-installed XLR cable. It suits deep desks or a mic that needs to reach a guest across a table. Be careful with model numbers: Gator’s similar-looking GFWMICBCBM2000 is rated for much less weight.
Heil PL-2T: best broadcast build
The PL-2T is a long-standing studio and ham-radio arm with internal springs and a quiet, sturdy build. It’s ideal for mid-weight dynamics like the SM7B. For heavier mics in big shock mounts, choose a 2 kg-rated arm instead.
Budget arms: when they’re fine
Arms in the $20–$40 range with exposed springs typically hold about 0.5–1 kg. They work well for USB mics and an SM58-class dynamic. For anything heavier, or if you record with a condenser where spring noise matters, step up to one of the arms above.
Desk and Positioning Checks
| Check | What to measure | Target |
|---|---|---|
| Desk thickness at the clamp | Desktop edge, including any lip | Within the clamp’s rated range (most cover about 0.4–2.4 in) |
| Reach needed | Clamp position to your mouth position | Arm reach minus 15–20% (arms sag near full extension) |
| Mic distance for dynamics | Mouth to grille | About 2–4 in (5–10 cm) |
| Mic distance for condensers | Mouth to capsule | About 6–12 in (15–30 cm), with pop filter |
| Camera clearance on video podcasts | Arm path relative to lens | Arm enters frame from the side or below the chin |
Glass desks, thin MDF and desks with a front lip often can’t take a clamp safely. A grommet or bolt-through flange mount, or a reinforcing plate under the clamp, prevents cracks and wobble.
Setup Steps That Prevent Sag and Noise
- Mount the mic and all accessories before adjusting tension. Tension set without the shock mount or pop filter will be wrong.
- Set the arm at your normal recording angle, then adjust spring tension or the tension knob until the arm stays put when you let go.
- Tighten the joints only enough to stop drift. Over-tightening wears the knob threads and makes the arm creak when you move it.
- Route the XLR cable loosely through the channels with slack at every joint. A tight cable pulls the arm and transmits vibration.
- Isolate the desk. Typing and mug bumps travel through the clamp. A shock mount and a high-pass filter at 80–100 Hz on the recording remove most of the thumps.
What Wears Out
- Springs relax. Expect to retighten tension every few months, especially near the arm’s rated maximum.
- Clamp pads compress. Rubber pads flatten, and the clamp starts to rotate on its own. Replace the pads or add a thin rubber sheet.
- Plastic knobs strip. On cheaper arms, plastic thread inserts are the first part to fail. The arms above use metal hardware where it matters.
More from Amazon
Programs that pair well with the guide above. Offers and eligibility are set by Amazon and may change.
Free shipping on eligible items, Prime Video and more. Eligible new members can start with a free trial.
Start a Prime free trialAd-free music streaming. Eligible new subscribers can start with a free trial.
Try Music Unlimited freeA Prime membership for ages 18-24 with a trial period. Eligibility is set by Amazon.
See Prime for Young AdultsAudiobooks and podcasts to listen to on the go. Eligible new members can start with a free trial.
Try Audible freeAs an Amazon Associate we earn from qualifying purchases.