Key takeaways
- Adjusting with no microphone attached: The spring is balanced for a load. Install the complete setup before tuning it.
- Turning the control several full rotations: Large changes can release stored force abruptly or damage threads. Use eighth-turn increments.
- Over-tightening to stop sagging: A slipping clamp, overloaded arm, or worn spring may be the real issue.
- Ignoring cable drag: A short, taut cable can pull the arm enough to cause drift.
- Forcing a frozen joint: Corrosion or a bent pivot may require repair rather than additional tension.
- Removing a concealed spring: Internal springs can release with considerable force. Do not disassemble an enclosed mechanism casually.
- Testing over fragile equipment: Move the arm away from monitors, cameras, and glass while making adjustments.
A microphone boom arm that slowly sinks, bounces after you move it, or refuses to hold its position usually has an incorrect spring-tension setting. Adjusting it is straightforward, but rushing the job can create new problems: an arm may drop onto a desk, damage a microphone, strip a tension knob, or become so stiff that its joints wear prematurely. The right setting supports the complete microphone setup while still allowing smooth movement.
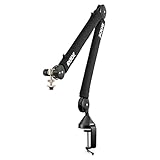
This guide explains how to adjust spring tension on a microphone boom arm safely, whether you use a compact budget arm such as the roughly $20 FIFINE CS1 or a heavier studio model such as the approximately $112 RØDE PSA1+. Exact controls differ, so treat the arm’s manual and markings as the final authority. The goal is not maximum tightness; it is balanced support with controlled movement.
As an Amazon Associate we earn from qualifying purchases at no extra cost to you. Product prices and availability are accurate as of the date shown and are subject to change.

What You Need
| Item | Why | Optional? |
|---|---|---|
| Microphone boom arm and its complete microphone setup | Tension must be adjusted with the microphone, mount, shock mount, and cable installed because their combined weight affects balance. | No |
| Phillips screwdriver or hex key set | Some arms use locking screws or pivot bolts instead of hand knobs. Use the exact size to avoid damaging the fastener. | Sometimes |
| Small adjustable wrench | Useful for a jam nut or pivot nut that needs a minor adjustment. | Yes |
| Soft towel or folded blanket | Cushions the microphone if the arm slips while you work. | Yes |
| Measuring tape | Helps you return the arm to a consistent position and check whether it is drifting over a 10- to 15-minute period. | Yes |
| Owner’s manual | Shows which knob controls spring tension and whether the mechanism is intended to be adjusted. | Recommended |
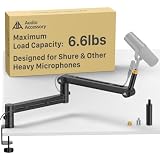
Before beginning, check the arm’s rated load. A typical microphone, shock mount, and cable may weigh about 1 to 3 pounds, while a broadcast microphone with a substantial mount can be heavier. Never assume that a large-looking arm can safely support any microphone. Also inspect the desk clamp or base. Tension adjustment cannot compensate for a loose clamp, thin desktop, or damaged mounting point.
Step-by-Step
1. Secure the base and clear the workspace (2 minutes)
Place the boom arm on a stable desk with the clamp fully seated. Tighten the clamp by hand until it is secure, then check that the desk is not flexing. Remove cups, electronics, and other objects from the arm’s swing path. Position a towel beneath the microphone in case the arm unexpectedly drops.
Keep one hand on the microphone or upper arm section whenever you loosen a tension control. A spring-loaded arm can move suddenly when tension is released.
2. Identify the tension controls (3 minutes)
Look at each pivot, especially the joints where the arm folds. Common designs use a round tension knob, a socket-head bolt, a threaded adjustment screw, or an exposed spring with a locking nut. Some arms have separate controls for the lower and upper sections; others use internal springs that are adjusted at one or both ends.
Do not confuse a tension control with a joint-locking knob. A locking knob may prevent a pivot from moving but will not correctly balance the microphone. If the arm has no visible adjustment and the spring is enclosed, consult the manual before removing covers or hardware.
3. Set the microphone in its normal working position (2 minutes)
Install the microphone, shock mount, clip, and cable exactly as you use them. Route the cable loosely along the arm rather than letting it hang heavily from one side. A tight cable can pull the arm upward or sideways and make a properly adjusted spring appear faulty.
Move the arm to a typical recording position—often 8 to 18 inches from your mouth—and keep the microphone roughly level. This is the position you should use for the initial test, not a completely empty arm.
4. Support the arm and loosen the control slightly (3 minutes)
Hold the microphone or the section nearest the joint with one hand. With the other hand, turn the tension knob only about one-eighth to one-quarter of a turn. On many arms, turning clockwise increases resistance and turning counterclockwise decreases it, but this is not universal. Watch the spring, joint, or manufacturer’s markings to confirm the direction.
Make only one adjustment at a time. Loosening several joints at once makes it difficult to determine which change helped and increases the chance of an uncontrolled drop.
5. Adjust in small increments (5–10 minutes)
Test the arm after every small change. Raise the microphone about 6 inches, release it carefully, and observe what happens. If it sinks, add tension in an eighth-turn increment. If it rises sharply, feels difficult to lower, or pulls away from the desired position, reduce tension by the same small amount.
The correct setting allows the arm to remain at rest without drifting more than roughly 1 inch over several minutes. It should also move smoothly when you reposition it with moderate hand pressure. Do not tighten the knob as far as it will go simply because the microphone is still sinking; that may indicate an overloaded arm, a loose pivot, or a failing spring.
6. Balance each arm section (5 minutes)
If the arm has two adjustable sections, test the lower section first, then the upper section. The lower joint carries more leverage and often needs more support. Move the microphone from a raised position to a lowered position and back again. If one joint feels stiff while another collapses, adjust the joints independently rather than applying more tension everywhere.
When a joint uses a nut and bolt, prevent the bolt head from turning while making a small nut adjustment. Stop if the hardware begins to bind, creak loudly, or rotate inside the arm.
7. Check the full range of movement (3 minutes)
Sweep the arm slowly through its useful range without forcing it against its stops. Check its forward, side-to-side, and vertical movement. It should not scrape the desk, twist the clamp, or swing into a monitor. Listen for clicking, grinding, or spring noise that was not present before adjustment.
Return the arm to the recording position and leave it there for 10 to 15 minutes. If it has dropped or risen noticeably, make one final eighth-turn adjustment and retest.
8. Lock and document the setting (2 minutes)
Once the arm stays in position, snug any locking rings or jam nuts without excessive force. Mark the preferred knob position with a small removable piece of tape, or note the number of turns from a fully relaxed setting. This makes future adjustments easier after changing microphones or accessories.
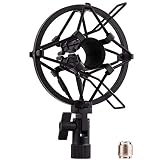
Confirm that the microphone cable has enough slack at every joint. Then tighten the shock mount and microphone thread by hand. Avoid using pliers on microphone hardware unless the manufacturer specifically permits it.
Mistakes to Avoid
- Adjusting with no microphone attached: The spring is balanced for a load. Install the complete setup before tuning it.
- Turning the control several full rotations: Large changes can release stored force abruptly or damage threads. Use eighth-turn increments.
- Over-tightening to stop sagging: A slipping clamp, overloaded arm, or worn spring may be the real issue.
- Ignoring cable drag: A short, taut cable can pull the arm enough to cause drift.
- Forcing a frozen joint: Corrosion or a bent pivot may require repair rather than additional tension.
- Removing a concealed spring: Internal springs can release with considerable force. Do not disassemble an enclosed mechanism casually.
- Testing over fragile equipment: Move the arm away from monitors, cameras, and glass while making adjustments.
How Often
Check the tension every one to three months if you use the arm daily, and whenever you change to a microphone or shock mount with a different weight. A quick check also makes sense after moving the desk, tightening the clamp, transporting the arm, or adding a cable bundle. Lightly wipe dust from exposed pivots, but do not apply oil or grease unless the manufacturer recommends a specific product. Lubricant can attract grit or reach spring components that were designed to remain dry.
For occasional users, an inspection every six months is generally enough. During each check, look for stretched springs, cracked plastic, loose bolts, damaged threads, and a clamp that no longer sits flat.
When to Call a Pro or Replace
Stop adjusting and seek manufacturer service if a spring is visibly cracked, a pivot is bent, metal flakes appear around a thread, or the arm drops suddenly even at its highest safe setting. A qualified repair shop can identify a damaged spring or worn bushing without exposing you to a released mechanism.
Replacement is often more practical when repair parts are unavailable, the arm cannot support the microphone’s weight, or the total repair approaches the cost of a new arm. Budget models around $20 can be suitable for light microphones, while more robust studio arms around $100 to $120 may offer smoother damping and higher load capacity. Compare the stated weight rating, warranty, desk-clamp design, and adjustment method—not price alone.
FAQ
Which way should I turn the tension knob?
On many boom arms, clockwise increases tension and counterclockwise decreases it, but the direction varies. Look for plus and minus markings or confirm in the manual. If there are no markings, make a one-eighth-turn change while supporting the arm and observe whether resistance increases or decreases.
Why does my boom arm keep sinking after adjustment?
It may be overloaded, the cable may be pulling it down, or a spring, pivot, or clamp may be worn. Reinstall the microphone and accessories, check the rated load, and test the arm with the cable relaxed. If it still sinks at maximum recommended tension, replace or service the arm rather than forcing the knob.
Can I adjust spring tension with the microphone attached?
Yes, and you generally should, because the microphone’s weight is part of the load. Support the microphone with one hand while adjusting with the other, and keep the arm away from fragile equipment. Never leave the microphone unsupported while loosening a joint significantly.
Should a properly adjusted arm move completely freely?
No. It should move smoothly but provide enough resistance to remain where you place it. If it swings freely and drifts, add a small amount of tension. If it requires force or jerks between positions, reduce tension slightly and inspect the pivot for damage or contamination.