Key takeaways
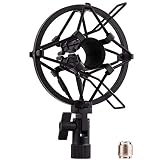
- Ignoring accessories: Count the shock mount, cable, windscreen, and adapter in the total weight.
- Mounting to a weak surface: Hollow-core desks, thin shelves, and damaged particleboard may not safely support a heavy arm.
- Extending the arm too far: Maximum reach creates more leverage and can make a rated load behave like a heavier one.
- Overtightening the clamp: Crushing the desktop does not make the setup safer; it can weaken the mounting area.
- Letting the cable carry the load: Tight cable routing can pull the microphone down or transmit desk vibrations.
- Adjusting only one hinge: Balance the entire arm, since each joint affects the others.
- Using a damaged arm: Bent tubes, cracked welds, stripped threads, or missing hardware are reasons to stop using it.
Mounting a heavy microphone on a low-profile boom arm looks simple, but a few ounces in the wrong position can make the arm sag, rotate, or pull loose from the desk. A microphone such as the Shure SM7B, Shure SM7dB, Blue Yeti, or Rode PodMic may also need a shock mount, windscreen, XLR cable, and adapter, increasing the total load. If the clamp is poorly positioned, the desk can be damaged, the microphone can fall, or the arm can drift into your keyboard and monitor.
The reliable approach is to calculate the complete microphone weight, confirm the arm’s capacity, install the clamp on a solid part of the desk, and balance the arm before tightening its joints. The following method works for most metal, low-profile desktop arms and is suitable for a 2026 recording, streaming, or podcasting setup.
As an Amazon Associate we earn from qualifying purchases at no extra cost to you. Product prices and availability are accurate as of the date shown and are subject to change.

What You Need
| Item | Why | Optional? |
|---|---|---|
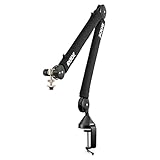
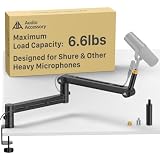
| Low-profile boom arm rated for the complete load | Provides the correct spring, hinge, and counterbalance strength. Examples include the AA AUDIO ACCESSORY Mic Arm Desk Mount, rated for up to 6.6 pounds, and the FIFINE BM88 Low Profile Microphone Boom Arm Stand. | No |
| Microphone, shock mount, windscreen, and cable | The arm must support the combined weight, not just the microphone body. | No |
| Desk clamp or grommet mount | Creates the structural connection between the arm and desk. | No |
| Measuring tape and kitchen or postal scale | Checks desk thickness, available clearance, and the actual microphone package weight. | Scale optional |
| Phillips screwdriver or hex keys | Used to secure the clamp and adjust arm tension, depending on the model. | No |
| Thin rubber or cork pad | Protects the desk finish and adds grip beneath the clamp. | Yes |
| Hook-and-loop cable ties | Reduces cable pull on the microphone and prevents snagging. | Yes |
Before buying, compare the total load with the arm’s stated capacity. A microphone listed at 2 pounds may become a 3- to 4-pound load after adding a shock mount, cable, and windscreen. Leave a safety margin of at least 20 percent whenever the manufacturer does not specify how the capacity was measured. For example, a 4-pound assembly is better suited to an arm rated for 5 pounds or more than one rated for exactly 4 pounds.
Step-by-Step
1. Weigh the complete microphone assembly (5 minutes)
Attach the shock mount, microphone, windscreen, and the cable you plan to use. Place the complete assembly on a scale, supporting the cable so it does not pull downward. Record the weight, then compare it with the boom arm’s maximum rating.
Do not treat a maximum capacity as a recommended everyday target. If your assembly weighs 5.5 pounds, an arm with a 6.6-pound limit may technically support it, but it will have less adjustment range and may be more likely to sag. A lighter shock mount or shorter cable can reduce leverage and improve stability.
2. Confirm desk thickness and mounting space (5 minutes)
Measure the desk at the intended mounting point. Many clamps accommodate a limited range of thicknesses, so check the arm’s instructions before tightening anything. Also look underneath the desk for metal frames, drawers, cable trays, or a hollow section that could prevent the clamp from sitting flat.
Choose a location close to a sturdy corner or leg, but leave enough room for the clamp’s lower jaw. Avoid a thin desktop edge, a glass panel, a folding table, or a particleboard area that is already swollen or cracked. Keep at least 2 inches of clear space around the arm’s base so its lower hinge can rotate freely.
3. Install the clamp squarely (8 minutes)
Remove the clamp’s lower pad if necessary and position the upper plate completely on the desk. If the desk finish is delicate, place a thin rubber or cork pad between the contact surfaces. The pad should not be so thick that it prevents the clamp from closing evenly.
Thread the lower jaw into place and tighten it by hand until both pads contact the desk. Check that the clamp is parallel with the desk edge, then tighten the handle gradually. Alternate between checking alignment and tightening; do not force the handle with pliers unless the manufacturer specifically permits it.
On a wood or composite desk, stop when the clamp is firmly locked and the desktop does not flex. Excessive pressure can crush the edge or leave a permanent indentation. Gently push the clamp sideways to verify that it does not shift.
4. Attach the arm and set its starting position (5 minutes)
Insert the boom arm into the clamp socket and secure the locking screw or collar. Position the arm so its first section points toward the back or side of the desk rather than straight over the edge. This keeps the center of gravity over the desk and reduces twisting force on the clamp.
Keep the arm folded during initial adjustment. If the boom has a cable channel or clips, leave them open until the microphone is balanced. You should be able to move the arm without the cable adding resistance.
5. Adjust tension with the microphone attached (10 minutes)
Attach the microphone and shock mount to the arm’s threaded connector. Support the microphone with one hand while adjusting the hinge tension with the other. Make small, even changes at each joint. The goal is for the arm to stay at the selected height without drifting upward or downward.
If the microphone drops, increase tension gradually. If the arm springs up, reduce tension or move the microphone closer to the arm’s hinge. A microphone positioned at the far end creates more leverage than the same microphone mounted closer to the base. Do not use extra washers or improvised weights unless the arm manufacturer recommends them.
6. Route the cable with slack (7 minutes)
Connect the cable only after the arm holds its position. Follow the arm’s clips or channel, leaving a gentle loop at every moving joint. Keep about 4 to 6 inches of slack near the microphone connector so the cable does not tug when the microphone is repositioned.
Secure the cable at several points, but do not cinch it tightly. A cable that is too short, tightly wrapped, or routed across a hinge can pull the arm downward and create noise. Keep the cable away from the clamp’s tightening handle and from sharp desk edges.
7. Test movement and lock the final position (5 minutes)
Move the microphone through its normal range: speaking position, storage position, and any position used for gaming or video calls. Watch for sagging, joint slip, clamp movement, and cable tension. Tap the desk lightly and confirm that the microphone settles without striking the desk or monitor.
Once the position is correct, tighten the arm’s friction knobs enough to prevent drift while preserving smooth movement. Avoid overtightening, which can damage threads or make future adjustments difficult.
Mistakes to Avoid
- Ignoring accessories: Count the shock mount, cable, windscreen, and adapter in the total weight.
- Mounting to a weak surface: Hollow-core desks, thin shelves, and damaged particleboard may not safely support a heavy arm.
- Extending the arm too far: Maximum reach creates more leverage and can make a rated load behave like a heavier one.
- Overtightening the clamp: Crushing the desktop does not make the setup safer; it can weaken the mounting area.
- Letting the cable carry the load: Tight cable routing can pull the microphone down or transmit desk vibrations.
- Adjusting only one hinge: Balance the entire arm, since each joint affects the others.
- Using a damaged arm: Bent tubes, cracked welds, stripped threads, or missing hardware are reasons to stop using it.
How Often
Check the clamp, hinge knobs, and threaded microphone mount once a month if the arm is used daily. Perform the same check whenever you move the desk, change microphones, add a shock mount, or reroute the cable. After the first week of use, retighten any fasteners that have settled, but do not automatically tighten every knob as hard as possible.
For a frequently moved arm, inspect it weekly. Look for a growing gap between the clamp and desk, new sagging, squeaking at a hinge, or cable strain. These signs usually indicate that the load balance or mounting pressure needs attention.
When to Call a Pro or Replace
Ask a qualified installer or furniture professional for help if the desk is glass, unusually thin, attached to a wall, or made from damaged composite material. Professional advice is also sensible when drilling a grommet hole through a finished desktop, routing cables through an electric sit-stand desk, or mounting to a custom surface.
Replace the arm if it cannot hold the microphone after proper tension adjustment, if a hinge slips repeatedly, or if the clamp leaves deep cracks or crushing in the desk. An arm that has been dropped, bent, or exposed to corrosion should not be trusted with a costly microphone above electronics.
FAQ
How heavy can a low-profile microphone arm support?
It depends on the specific model and how far the microphone extends from the base. Some heavy-duty arms are rated around 6.6 pounds, while lighter models may support less. Compare the rating with the complete assembly and leave a safety margin rather than operating continuously at the maximum.
Why does my heavy microphone keep sagging?
Sagging usually results from insufficient hinge tension, excessive reach, an overloaded arm, or a cable pulling on the microphone. Move the microphone closer to the base, reduce cable tension, and adjust each hinge gradually. If it still drops, the arm may be undersized or worn.
Is a desk clamp or grommet mount better?
A clamp is easier to install and reposition, while a grommet mount can provide a more direct, stable connection through a suitable desk. A grommet requires drilling and a solid desktop area, so it is not appropriate for every desk. Whichever method you use, the mounting surface must support the clamp or hardware without flexing.
Can I mount a shock mount and microphone on the same low-profile arm?
Yes, if their combined weight is within the arm’s capacity and the threaded connections match. Install the shock mount first, add the microphone, then rebalance the arm. Keep the assembly close enough to the hinge that it remains stable through the full range of movement.