Key takeaways
- No stated weight capacity, especially for a long desktop arm or overhead boom.
- Capacity listed for the microphone alone rather than the complete microphone, mount, filter, and cable package.
- A lightweight tripod with narrow legs being marketed for fully extended overhead use.
- Plastic pivot housings or tiny thumb screws at major load-bearing joints.
- A desk clamp that does not list its supported desk thickness.
- Reviews that repeatedly mention sagging, slipping, spring noise, stripped threads, or an arm that rebounds when released.
- No 3/8-inch or 5/8-inch thread information.
What's inside
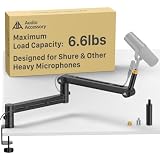
Heavy studio microphones expose every weakness in a boom arm. The most common mistake is shopping by appearance instead of total load: a microphone may weigh 1.5 pounds on its own, but add a shock mount, pop filter, XLR cable, and adapter and the arm may actually be carrying 3 to 5 pounds. Another frequent error is measuring only the microphone’s weight while ignoring reach. An arm that holds 4 pounds close to its base may sag or drift when extended 30 inches across a desk.
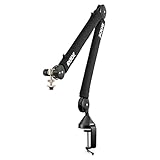
Buyers also confuse a desk-mounted broadcast arm with a floor boom stand. Both are useful, but they solve different problems. A compact articulated arm such as the RØDE PSA1+ is built to bring a mic close to a seated speaker. A tall overhead floor stand, such as the 93-inch LyxPro SMT-1, is designed for larger rooms, instruments, overhead placement, and situations where a desktop clamp is impractical. In 2026, the best choice is still the one that matches your microphone package, workspace, and recording position—not simply the one with the highest advertised capacity.
As an Amazon Associate we earn from qualifying purchases at no extra cost to you. Product prices and availability are accurate as of the date shown and are subject to change.


Decide These 3 Things First
- Calculate your working load. Add the microphone, shock mount, pop filter, cable, and any adapter. For example, a 2.2-pound microphone plus a 0.8-pound shock mount, 0.3-pound pop filter, and 0.2-pound cable creates a 3.5-pound working load. Choose an arm rated at least 25% above that number; for this example, look for a 4.5-pound minimum capacity.
- Choose desktop or floor placement. A desk boom arm is ideal for podcasting, voice-over, streaming, and seated vocal recording. Choose a floor stand when you need more than roughly 36 inches of reach, cannot clamp to furniture, or need to place the microphone above a drum kit, piano, guitar cabinet, or standing performer.
- Measure your room and furniture. Check desk thickness, wall clearance, monitor placement, and chair movement before ordering. Most desk clamps fit surfaces around 0.4 to 2.4 inches thick, while a floor boom may need a clear footprint of 24 to 36 inches wide for stable tripod legs.
Size, Reach, and Working Position
Reach is more important than overall arm length. A desk arm with a 30-inch horizontal reach may sound generous, but its practical range becomes smaller once it is mounted behind a monitor or pushed against a wall. For a typical 24- to 30-inch-deep desk, a horizontal reach of 28 to 36 inches lets the microphone move from a parked position to a comfortable speaking position without forcing you to lean forward.
For most seated vocal and podcast setups, look for 26 to 38 inches of horizontal movement and at least 20 inches of vertical adjustment. The RØDE PSA1+ is an example of the desktop format, with approximately 37 inches of horizontal reach and about 34 inches of vertical reach. Those dimensions suit a mic positioned 4 to 8 inches from the speaker’s mouth while keeping the arm outside the camera frame when possible.
Floor boom stands need different measurements. A stand reaching 80 to 93 inches high can work for standing vocals, overhead instruments, and room miking. The LyxPro SMT-1, for example, is listed with a 93-inch maximum stand height and a telescoping boom up to 76 inches. That length is useful, but it also increases leverage dramatically. At full extension, the counterweight and tripod footprint matter as much as the stand’s height rating.
Before buying, map the mic’s intended position with a tape measure. Allow 6 to 12 inches of clearance behind the arm’s base for pivots and cable bends. If the arm needs to reach around an ultrawide monitor, choose extra reach rather than assuming the microphone can be mounted directly above the screen.
Material, Weight, and Base Stability
Steel is generally the preferred material for heavy studio microphone support because it resists flex and holds up well at threaded joints. Aluminum can be excellent when used in thicker tubing or reinforced cast sections, but thin aluminum arms may twist under an off-center load. Plastic should be limited to cable clips, adjustment knobs, and cosmetic covers—not primary load-bearing pivots.
For desk-mounted arms, pay attention to the clamp and mounting plate. A good clamp should use a broad contact pad, a steel screw or bolt, and protective padding that prevents desk damage. A small clamp pad can dent particleboard or MDF desktops, particularly when supporting a 4-pound mic package at a 30-inch extension. If your desk has a hollow core, glass top, beveled edge, or thickness under 0.75 inch, a bolt-through mount with a reinforcement plate is usually safer than a clamp.
For floor stands, weight is an advantage. Lightweight models around 4 to 6 pounds are convenient for basic vocal work, but a heavy microphone on a long boom can overwhelm them. For serious overhead placement, look for a stand in the 10- to 20-pound range with sturdy legs, locking braces, and a counterweight. The counterweight should be movable along the boom, letting you balance different microphone packages without relying solely on overtightened knobs.
Budget tripod boom stands, including models in the general category of the InnoGear and BILIONE floor stands, can be practical for lighter dynamic microphones and occasional use. They should not automatically be treated as safe overhead stands for a large condenser microphone, shock mount, and accessory package. Check the manufacturer’s stated load limit and keep the boom shorter when using any light stand.
Construction: Joints, Springs, and Thread Compatibility
A boom arm is only as dependable as its joints. On desktop arms, look for metal pivots, concealed or protected springs, tension adjustment points, and a cable channel that does not pinch the XLR cable. Exposed springs are not inherently bad, but enclosed spring systems tend to look cleaner and are less likely to catch loose sleeves, headphone cables, or acoustic treatment.
Heavy microphones benefit from an arm with adjustable tension rather than a fixed spring rate. If an arm is rated from 0.25 to 4.5 pounds, it should hold both a light dynamic mic and a heavier condenser package after adjustment. Avoid arms that require maximum tension to hold your setup; that leaves little reserve capacity and can make positioning jerky.
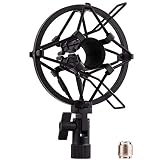
Thread compatibility is equally important. Most studio microphones and shock mounts use a 5/8-inch thread, often with a 3/8-inch adapter included. Confirm that the arm includes the adapter you need. A 3/8-to-5/8-inch adapter costs little, but forgetting it can delay setup. Also check whether the microphone’s shock mount has an unusually wide base that may interfere with the arm’s end joint.
For floor booms, test the locking system conceptually before purchase: you want separate locks for height, boom angle, boom length, and counterweight position. A single small plastic knob trying to control several pounds of leverage is a warning sign.
Comfort, Noise Control, and Everyday Performance
A technically strong boom arm can still be frustrating if it transmits desk vibrations or makes frequent repositioning difficult. For spoken-word recording, the arm should move quietly with one hand, stay where placed, and avoid creaks when you lightly touch the microphone. It should also allow the microphone to sit 4 to 8 inches from your mouth without blocking a monitor or forcing poor posture.
Internal cable routing is a worthwhile convenience, especially in video-facing setups. It reduces visual clutter and helps prevent cable snags. However, make sure the channel accommodates a standard XLR cable; very thick braided cables may not fit neatly in narrow channels. A loosely secured cable can also affect balance when the arm is near its capacity.
Desk isolation matters. A boom arm cannot replace proper technique, but a rubber-padded clamp and shock mount can reduce noise from typing, bumping the desk, or adjusting equipment. If you type while recording, position the arm base on the far side of the desk and use a shock mount. For particularly vibration-prone desks, a floor stand may produce cleaner results than a desk-mounted arm.
Price Tiers and What You Actually Get
Budget: $25 to $60. Expect basic tripod boom stands and entry-level desk arms. These work best with microphone packages under about 2 pounds and short-to-medium reach. Models around $27.99 to $39.99 can be useful starter options, but inspect leg width, clamp construction, and stated capacity carefully. Budget arms often have more plastic hardware, less refined tension adjustment, and weaker cable management.
Mid-range: $70 to $140. This is the practical sweet spot for many home studios. Expect stronger steel construction, smoother adjustment, better clamps, internal cable routing, and a more realistic capacity for a 3- to 4-pound microphone package. The RØDE PSA1+, at roughly $112, sits in this general category and is aimed at serious desktop broadcast and recording setups.
Premium and specialty: $150 to $300-plus. Spend here when you need long overhead reach, enhanced isolation, highly durable hardware, or professional-room reliability. A specialty floor boom such as the $169.99 LyxPro SMT-1 addresses a different need from a premium desk arm: it offers substantial height and telescoping reach for larger-scale placement. Higher price does not automatically mean better for a desktop; it may simply mean a different format.
Warranty, Delivery, and Assembly
Look for at least a 1-year manufacturer warranty on a desk boom arm and clear access to replacement parts such as clamp pads, thread adapters, or cable clips. Premium brands may offer longer coverage, but read what is covered: cosmetic wear and overloading are often excluded.
When ordering a floor boom, check the shipping dimensions and packaged weight. Large stands may arrive in cartons 35 to 50 inches long and can weigh 15 pounds or more once packed. Inspect the package promptly for bent tubing, stripped threads, missing counterweights, or damaged clamp pads.
Assembly should take roughly 10 to 25 minutes for most arms. Do not use excessive force on tension screws or locking knobs. Assemble the stand on a flat surface, install the microphone only after balancing the boom, and route the XLR cable with enough slack for full movement. Recheck every lock after the first few sessions, since new hardware can settle slightly.
Spec Checklist
| Spec | Budget | Mid | Premium |
|---|---|---|---|
| Recommended working load | Up to 2 lb | 3 to 4.5 lb | 4.5 lb and above, or counterweighted overhead use |
| Desktop reach | 20 to 28 in | 28 to 38 in | 32 to 40+ in with refined adjustment |
| Primary construction | Mixed steel and plastic | Steel arms, reinforced clamp | Heavy steel or reinforced aluminum, metal pivots |
| Floor stand height | 50 to 70 in | 65 to 80 in | 80 to 93+ in with counterweight |
| Cable management | External clips | Clips or partial internal routing | Integrated routing or protected channels |
| Typical price | $25 to $60 | $70 to $140 | $150 to $300+ |
Red Flags
- No stated weight capacity, especially for a long desktop arm or overhead boom.
- Capacity listed for the microphone alone rather than the complete microphone, mount, filter, and cable package.
- A lightweight tripod with narrow legs being marketed for fully extended overhead use.
- Plastic pivot housings or tiny thumb screws at major load-bearing joints.
- A desk clamp that does not list its supported desk thickness.
- Reviews that repeatedly mention sagging, slipping, spring noise, stripped threads, or an arm that rebounds when released.
- No 3/8-inch or 5/8-inch thread information.
FAQ
How much weight should a boom arm support for a heavy studio microphone?
Add every item attached to the arm, then choose at least 25% more rated capacity. A 3.5-pound total microphone package should go on an arm rated for at least 4.5 pounds. For a long extension, extra headroom is even more important.
Is a desk boom arm safe for a large condenser microphone?
Yes, if the arm is rated for the complete load, the desk clamp is secure, and the desk itself is sturdy. Large condensers often become much heavier once a shock mount and pop filter are added, so do not judge suitability by the microphone body alone.
When should I choose a floor boom instead of a desk arm?
Choose a floor boom for standing vocals, drum overheads, piano, guitar amps, room miking, or any setup requiring more than about 36 inches of reach. It is also the better choice when desk vibrations are a recurring recording problem.
Do I need a counterweight on a microphone boom stand?
You need one when a floor boom extends far from its center column, particularly with a microphone package above 2 to 3 pounds. Slide the counterweight until the boom balances before tightening the locks; do not depend on overtightening alone to prevent droop.