Key takeaways
- Always unplug the keyboard before cleaning and never submerge the board body in water.
- Photograph your key layout before pulling caps so reassembly is quick and error-free.
- Let washed keycaps dry completely before reinstalling to avoid trapped moisture near the switches.
- Use 90 percent or higher isopropyl alcohol; it evaporates fast and leaves no residue.
What's inside
A mechanical keyboard is a precision tool, and like any tool it performs best when it is clean. Dust, crumbs, skin oil, and the occasional drink spill work their way between the keycaps and into the switches, where they cause mushy presses, sticky keys, and eventually failed switches. Regular cleaning keeps your board feeling crisp and extends its life by years.
This 2026 guide walks you through cleaning a mechanical keyboard the right way, from a quick surface tidy to a deep clean with the keycaps removed. You will learn which tools to use, how to safely pull and wash keycaps, how to clean around the switches without damaging them, and how to keep your board cleaner for longer between sessions.
As an Amazon Associate we earn from qualifying purchases at no extra cost to you. Product prices and availability are accurate as of the date shown and are subject to change.


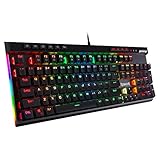
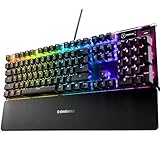


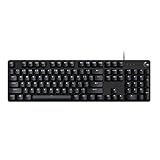

⚡ Save on Your Next PC — Amazon Prime
Prime members get fast free shipping on the systems above, plus early access to Prime Day & Black Friday PC deals. New members get a 30-day free trial.
Watch: How to Clean a Mechanical Keyboard — Video Review
Gather the Right Tools First
Before you touch a single key, assemble your kit so you are not improvising halfway through. You will want a keycap puller (often included with boards like the Redragon or AULA F75 Pro), a can of compressed air, a soft brush, isopropyl alcohol of 90 percent or higher, cotton swabs, and a microfiber cloth. For washing keycaps you will also need a bowl of warm soapy water and a towel. Using proper tools protects both the keycaps and the delicate switches underneath from accidental damage.
The Quick Surface Clean
For routine maintenance, unplug the keyboard first, then turn it upside down and gently shake to dislodge loose crumbs. Use compressed air in short bursts between the rows to blast out dust, working across the board at an angle. Wipe the keycaps and case with a microfiber cloth lightly dampened with isopropyl alcohol, which cuts through skin oil without leaving residue. A five-minute surface clean every week or two prevents the buildup that makes a deep clean necessary.
Deep Cleaning: Removing and Washing Keycaps
Every few months a full clean is worth the effort. Photograph your layout first so you can put keys back correctly, then use the keycap puller to remove each cap by pulling straight up. Soak the keycaps in warm soapy water for a couple of hours, rinse, and lay them out to dry completely before reinstalling. Never submerge the keyboard body itself. Hot-swappable boards like the Redragon wired keyboard or the AULA F75 Pro make this easier, but the washing process is the same for any set of removable caps.
Cleaning Around the Switches
With the keycaps off, the exposed switch housings need care. Use compressed air to clear dust from between the switches, then dip a cotton swab lightly in isopropyl alcohol to wipe the plate and around each switch stem. Keep liquid away from the switch openings themselves, since alcohol inside a switch can affect its feel. Work gently; the goal is to lift grime from the surface, not to flood the mechanism. Let everything dry fully before reassembly.
Preventing Buildup Between Cleans
The easiest cleaning is the cleaning you never have to do. Avoid eating over your keyboard, wash your hands before long sessions to reduce oil transfer, and keep a cover over the board when it is not in use. Water-resistant boards like the SteelSeries Apex 3 tolerate accidents better, but prevention still beats cleanup. A quick weekly wipe and a monthly compressed-air pass will keep most boards feeling factory-fresh with minimal effort.
Tips
- Always unplug the keyboard before cleaning and never submerge the board body in water.
- Photograph your key layout before pulling caps so reassembly is quick and error-free.
- Let washed keycaps dry completely before reinstalling to avoid trapped moisture near the switches.
- Use 90 percent or higher isopropyl alcohol; it evaporates fast and leaves no residue.
Frequently Asked Questions
How often should I clean my mechanical keyboard?
A quick surface wipe every week or two keeps oil and dust down, while a full deep clean with the keycaps removed every three to six months handles the buildup that accumulates inside the board.
Can I wash keycaps in the dishwasher?
It is safer to hand-wash them in warm soapy water. Dishwasher heat can warp or fade keycaps, and the high temperature may damage legends. Soak, rinse, and air-dry instead for reliable results.
Is it safe to use alcohol on the switches?
Yes, in moderation. Use a lightly dampened swab to clean the plate and around the switches, but keep alcohol out of the switch openings themselves, as liquid inside can alter how the switch feels.
What if I spill liquid on my keyboard?
Unplug it immediately, turn it upside down to drain, and let it dry for at least 48 hours before powering on. Sticky spills like soda usually require removing the keycaps and cleaning the affected switches.
Conclusion
Cleaning a mechanical keyboard is simple once you have the right tools and a routine. Keep up with quick weekly wipes, deep clean every few months by washing the keycaps and clearing the switches, and take small steps to prevent buildup in the first place. A little regular care keeps every keypress crisp, protects your investment, and lets your board look and feel great for many years.