Key takeaways
- A listing gives only phrases such as “heavy duty” without a pound or kilogram payload rating.
- The advertised capacity is below, or exactly equal to, your assembled microphone weight.
- The clamp lacks a protective pad, has a very narrow contact area, or does not list supported desk thickness.
- Product photos show a shock mount and pop filter, but the package contents do not clearly say they are included.
- The arm has proprietary threads and does not include a 3/8-inch to 5/8-inch adapter.
- A low-profile design has no stated vertical clearance, leaving you unable to judge monitor and camera compatibility.
- Reviews repeatedly mention drifting joints, cracked clamp screws, or cable clips that detach under normal routing.
What's inside
- Decide These 3 Things First
- Size and Reach: Fit the Arm to Your Desk
- Material: Steel Matters More Than Cosmetic Finish
- Construction and Payload Capacity: Read the Rating Carefully
- Comfort and Performance: Silence, Stability, and Positioning
- Price Tiers: Spend for Load Reserve and Adjustability
- Warranty: Check the Useful Details
- Delivery and Assembly: Plan for a 10- to 30-Minute Setup
- Spec Checklist
- Red Flags
- FAQ
The most common boom-arm mistake is buying for the microphone alone. Payload capacity has to cover the microphone, shock mount, pop filter, cable, and sometimes a small adapter or wireless receiver. A 1.5-pound mic can become a 2.5-pound working load quickly, and an arm that looks sturdy in product photos may sag, drift, or transmit desk vibrations once it is fully equipped.
- Decide These 3 Things First
- Size and Reach: Fit the Arm to Your Desk
- Material: Steel Matters More Than Cosmetic Finish
- Construction and Payload Capacity: Read the Rating Carefully
- Comfort and Performance: Silence, Stability, and Positioning
- Price Tiers: Spend for Load Reserve and Adjustability
- Warranty: Check the Useful Details
- Delivery and Assembly: Plan for a 10- to 30-Minute Setup
- Spec Checklist
- Red Flags
- FAQ
Another frequent error is treating “low profile” as a universal upgrade. A low-profile arm can keep your camera view clean, but it may need more desk depth and may not reach as high as a traditional spring arm. Before shopping in 2026, focus on real loaded weight, reach, mounting compatibility, and the way the arm fits your desk—not just the advertised maximum capacity.
As an Amazon Associate we earn from qualifying purchases at no extra cost to you. Product prices and availability are accurate as of the date shown and are subject to change.


Decide These 3 Things First
- Calculate your fully loaded weight. Add the microphone, mount, pop filter, cable, and adapters. For example, a 1.2-pound dynamic mic plus a 0.8-pound shock mount, 0.2-pound pop filter, and 0.2-pound cable load equals 2.4 pounds. Choose an arm rated at least 25% to 50% above that number.
- Measure the desk and microphone position. Most desktop boom arms need a desk edge between 0.4 and 2.4 inches thick. Measure the distance from the clamp location to your mouth position; many streamers need 24 to 32 inches of horizontal reach and 12 to 20 inches of usable height adjustment.
- Choose a mounting and cable plan. A clamp is fastest and usually fits most desks, while a grommet mount is more secure for heavy setups. Decide whether you want an exposed XLR or USB cable, or internal cable routing for a cleaner frame.
Size and Reach: Fit the Arm to Your Desk
Boom-arm dimensions determine whether the microphone can sit close enough for clear speech without blocking your monitor, keyboard, or face on camera. Conventional spring arms often provide a combined reach of 28 to 35 inches, with two articulated sections. They can swing above or around a monitor and work well on desks at least 24 inches deep.
Low-profile arms usually run parallel to the desk surface. Many offer approximately 25 to 32 inches of reach, but their vertical range can be more limited. They are particularly useful when a camera is mounted behind the monitor and you want to keep the arm below eye level. On a shallow 18- to 20-inch desk, however, a low-profile model may force the mic too close to the display or leave too little room for a keyboard.
Check the arm’s folded footprint, too. A typical full-size arm may extend 14 to 18 inches behind its clamp when pushed back. If your desk sits flush against a wall, choose an arm that pivots forward from the clamp or uses a low-profile hinge system. For a compact setup, allow at least 3 inches of clearance behind the desk for cable bends and clamp hardware.
Material: Steel Matters More Than Cosmetic Finish
Most worthwhile streaming boom arms use powder-coated steel tubing or stamped steel links. Aluminum can be light and attractive, but the important question is whether the hinge plates, threaded joints, and clamp body are also substantial. Thin aluminum sections paired with plastic joints can flex under a 2- to 3-pound load, creating a gradual downward dip during a recording session.
For entry-level arms around $20 to $35, expect painted steel tubes, external springs, and some ABS plastic trim. These can be perfectly adequate for a 0.5- to 1.5-pound USB microphone. In the $45 to $90 range, look for thicker steel structures, reinforced clamp plates, metal adjustment knobs, and cable channels. Premium arms above $100 often add smoother internal spring mechanisms, more refined metal castings, and better resistance to repeated repositioning.
Also inspect the desk clamp. A clamp with a contact pad at least 1.5 by 2 inches distributes pressure better than a narrow metal screw. On veneer, particleboard, glass, or thin laminate desks, use a wood or metal reinforcement plate roughly 4 by 4 inches to reduce denting and flex.
Construction and Payload Capacity: Read the Rating Carefully
Payload capacity is the central specification, but it is not always presented consistently. Some brands list a maximum load in pounds, others in kilograms, and some quote a range. Convert carefully: 1 kilogram equals 2.2 pounds. An arm rated for 1 to 1.5 kilograms supports roughly 2.2 to 3.3 pounds; an arm rated to 2 kilograms supports about 4.4 pounds.
Do not buy exactly to the published maximum. If your microphone package weighs 3 pounds, choose an arm with a stated working range that comfortably includes 3 pounds and a maximum around 4 pounds or more. This reserve helps the arm stay in position and leaves room for a heavier shock mount, metal pop filter, or thicker XLR cable.
Traditional exposed-spring arms may have adjustment screws or tension knobs. They are flexible, but loose screws can require periodic retightening. Internal-spring arms look cleaner and generally reduce pinch points, although their tension adjustment may be less obvious. Low-profile arms commonly use friction joints or hidden springs; these should hold position without needing excessive force to move.
Mic-thread compatibility matters as well. Most microphones and shock mounts use either 5/8-inch or 3/8-inch threads. A good arm includes a removable 3/8-inch adapter and a standard 5/8-inch mount. If you use a heavy broadcast-style dynamic microphone, confirm that the included adapter is metal rather than a lightweight plastic insert.
Comfort and Performance: Silence, Stability, and Positioning
A boom arm should improve your recording workflow, not become another source of noise. The best placement puts the mic 4 to 8 inches from your mouth for most spoken streaming setups, angled slightly off to one side to reduce plosives. The arm should reach that position without being fully stretched out, since maximum extension can make vibration and sag more noticeable.
Look for cable management that holds one XLR or USB cable without pulling on the microphone. Internal channels are tidy, while removable clips are easier to service. Leave a 2- to 3-inch slack loop near moving joints so the cable does not tug when you reposition the arm.
Desk vibration is often mistaken for a microphone problem. Mechanical keyboards, controller taps, and desk bumps can travel through a clamp-mounted arm. A shock mount helps, but it does not fix a wobbly desk. If your desktop flexes when you type, reinforce the clamp area or use a sturdier desk before spending heavily on a more elaborate arm.
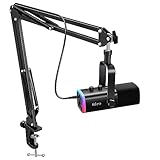
The InnoGear low-profile arm at about $25 is the kind of budget option that can make sense for a light USB mic and a simple pop filter. The FIFINE BM88, around $57, is positioned more toward a dedicated low-profile streaming setup. Treat included accessories as a bonus, but compare the arm’s stated payload range with your complete mic package.
Price Tiers: Spend for Load Reserve and Adjustability
Budget: $20 to $40. Expect basic clamp mounting, external springs or simple friction joints, and payloads commonly intended for lighter microphones. This tier suits compact USB mics, lightweight condensers, and starter streaming rigs. A bundled option such as the roughly $30 TONOR TC310+ microphone set can be practical when you need both a mic and arm, but verify whether the included arm is designed for upgrades to a heavier microphone.
Mid-range: $45 to $100. This is the sweet spot for many streamers. You should find stronger clamps, cleaner cable routing, smoother movement, and capacity appropriate for many 2- to 4-pound complete assemblies. The approximately $57 FIFINE BM88 and the roughly $68 FIFINE AmpliGame AM8T bundle illustrate two different buying paths: one emphasizes the arm itself, while the other combines a microphone and mounting solution.
Premium: $100 to $180 or more. Pay this when you need frequent repositioning, a polished on-camera look, a heavy broadcast microphone setup, or long-term durability. Premium pricing should buy better joint engineering, not merely a brand name or a black finish. Compare capacity, reach, warranty terms, and replacement-part availability.
Warranty: Check the Useful Details
A one-year limited warranty is common for boom arms, while some higher-priced models offer two years or longer. Read what is covered: manufacturing defects in springs, hinges, clamps, and mounting threads are more meaningful than vague coverage language. Cosmetic scratches, normal finish wear, and damage from overloading are usually excluded.
Keep the receipt and photograph the arm’s serial label, if it has one. Before the return window closes, test the arm with your fully assembled microphone for at least several position changes: low near the desk, level with your mouth, and extended toward the center of the desk. You are checking for clamp slip, joint creep, and interference with monitors—not trying to exceed its stated payload.
Delivery and Assembly: Plan for a 10- to 30-Minute Setup
Most boom arms arrive partly assembled and can be installed in 10 to 30 minutes. The box should include a desk clamp, arm assembly, thread adapter, cable clips or cable cover, and basic instructions. Grommet hardware may be included only on mid-range and premium models.
Before installation, clear a 12- by 12-inch work area at the desk edge. Tighten the clamp firmly by hand, then check that the desk surface is not compressing. Do not use excessive force on glass desks unless the manufacturer specifically approves that use. Route the cable after you set the arm tension; otherwise, cable drag can make a properly adjusted arm appear too weak.
If an arm uses tension screws, make adjustments in small increments—about one-quarter turn at a time. Test with the microphone attached after every adjustment. Over-tightening can make an arm difficult to move and can put unnecessary stress on the joints.
Spec Checklist
| Spec | Budget | Mid | Premium |
|---|---|---|---|
| Typical price | $20–$40 | $45–$100 | $100–$180+ |
| Recommended complete load | 0.5–2 lb | 1.5–4 lb | 3–5+ lb, per stated rating |
| Horizontal reach | 24–30 in. | 28–32 in. | 30–36 in. |
| Desk thickness range | 0.4–2 in. | 0.4–2.4 in. | 0.4–3 in. or clamp/grommet options |
| Construction | Steel tubes, basic joints | Reinforced steel, metal hardware | Refined metal joints, internal springs |
| Cable management | External clips | Clips or partial channels | Integrated channels or concealed routing |
| Warranty expectation | 90 days–1 year | 1–2 years | 2 years or longer |
Red Flags
- A listing gives only phrases such as “heavy duty” without a pound or kilogram payload rating.
- The advertised capacity is below, or exactly equal to, your assembled microphone weight.
- The clamp lacks a protective pad, has a very narrow contact area, or does not list supported desk thickness.
- Product photos show a shock mount and pop filter, but the package contents do not clearly say they are included.
- The arm has proprietary threads and does not include a 3/8-inch to 5/8-inch adapter.
- A low-profile design has no stated vertical clearance, leaving you unable to judge monitor and camera compatibility.
- Reviews repeatedly mention drifting joints, cracked clamp screws, or cable clips that detach under normal routing.
FAQ
How much payload capacity do I need for a streaming microphone?
Add every item mounted on the arm, then buy at least 25% to 50% above that total. For a 2-pound complete setup, an arm rated for at least 2.5 to 3 pounds is a sensible minimum; 4 pounds provides more useful margin.
Does a shock mount count toward boom-arm payload?
Yes. The payload includes the microphone, shock mount, pop filter, cable, adapters, and any accessories attached to the arm. A metal shock mount can add 0.5 to 1 pound by itself.
Are low-profile boom arms better for streaming?
They are better when you want a clean camera frame and your desk has enough depth for their horizontal layout. A traditional articulated arm can be better for tall monitor arrangements, tight desk corners, or setups that need more vertical flexibility.
Can a boom arm damage my desk?
It can dent soft wood, chip weak laminate, or stress thin glass if the clamp is overtightened. Use the supplied pad, avoid exceeding the desk or arm rating, and add a 4-by-4-inch reinforcement plate when mounting to particleboard, thin veneer, or a flexible desktop.