Key takeaways
- Do not point the webcam at a bright window while your face remains in shadow.
- Do not combine several cheap LED bulbs with different dimmers during troubleshooting.
- Do not run a ring light at full brightness inches from your face.
- Do not choose 50 Hz or 60 Hz randomly; match the setting to your local electrical standard.
- Do not place the light directly behind the webcam if it creates a bright reflection in glasses.
- Do not assume every brightness change is flicker. Autofocus, auto exposure, and unstable USB power can look similar.
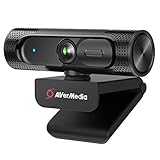
A flickering webcam in a low-light stream setup is usually caused by a mismatch between your camera settings, room lighting, and the electrical frequency of the lights. The problem may look like brightness pulsing, horizontal bands, color shifts, or a camera that repeatedly brightens and darkens your face. It is especially common when a webcam is pointed toward a dim room and relies on automatic exposure.
The good news is that you usually do not need a new camera. A steady light source, the right power settings, and a few manual adjustments can solve the issue in minutes. This guide explains how to fix flickering webcam in stream low light setup problems for livestreams, video calls, recordings, and similar camera use in 2026.
As an Amazon Associate we earn from qualifying purchases at no extra cost to you. Product prices and availability are accurate as of the date shown and are subject to change.

What You Need
| Item | Why | Optional? |
|---|---|---|
| Webcam and streaming app | You need access to camera controls such as exposure, white balance, frame rate, and anti-flicker settings. | No |
| Stable LED key light | A constant front-facing light prevents the webcam from constantly adjusting to a dark room. | No, if your room already has even lighting |
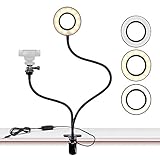
| Webcam Light Stand for Live Stream with ring light and webcam mount | A compact way to place a webcam and light together. The listed model is designed for several Logitech webcams and costs about $20–$30. | Yes |
| Clip-on Video Conference Lighting Kit | A laptop-mounted option with five color modes and five brightness levels; typical price is about $15–$25. | Yes |
| USB power adapter or powered hub | Provides a dependable power source for a USB light. Avoid relying on a loose or overloaded port. | Usually |
| Small piece of white foam board or light-colored wall | Reflects light back onto your face and reduces harsh shadows without adding another powered fixture. | Yes |
For most desks, position the main light 18–30 inches from your face, slightly above eye level, and about 15–30 degrees to one side of the webcam. A small LED light rated around 5–15 watts is generally sufficient for a close-up webcam shot, though the correct brightness depends on the room, diffuser, and distance. Do not place a bare, very bright light directly against the lens; it can cause glare and make the webcam reduce exposure too aggressively.
Step-by-Step
1. Confirm that the problem is lighting-related (2 minutes)
Open your streaming or video-call software and watch the preview without touching the camera. Look for rhythmic pulsing, moving dark bands, or brightness changes that repeat several times per second. Then cover the webcam briefly or point it toward a uniformly lit wall.
If the flicker disappears when the camera faces a brighter, evenly lit surface, automatic exposure is probably involved. If the picture still flickers when the webcam is covered, the cause may be the USB connection, camera driver, cable, or the light’s power supply.
2. Remove unstable light sources (3 minutes)
Turn off any dimmable bulbs, inexpensive LED strips, decorative RGB lights, and lamps with a visible pulse. Some LED bulbs flicker rapidly because their internal electronics regulate power unevenly. Your eyes may not notice it, but the webcam can capture it clearly.
For testing, use one known-stable light source. Daylight can work, but do not rely on sunlight as your only permanent solution because clouds and changing outdoor brightness will make the camera compensate. Close blinds or curtains enough to create a consistent environment.
3. Add a light in front of the webcam (5 minutes)
Place a ring light, panel, or clip-on light near the webcam so your face is brighter than the background. Keep the light at least 18 inches away at first and use the lowest comfortable brightness. Move it farther away if your skin looks washed out or the camera begins hunting between bright and dark exposure.
A webcam light stand with a ring light can keep the camera and light aligned, which is useful on a small desk. A clip-on monitor light is more convenient for laptop users. The two example products fall into an approximately $15–$30 buying range, so you can test a basic solution without committing to studio equipment.
4. Set the correct power frequency (3 minutes)
In the webcam’s controls, look for “anti-flicker,” “power line frequency,” or “frequency.” Choose 60 Hz in the United States and Canada. Choose 50 Hz in regions that use 50 Hz household power. If the camera offers both 50 Hz and 60 Hz, selecting the wrong option can produce rolling bands or visible pulsing under artificial light.
Some apps hide this setting. Check the manufacturer’s camera utility or your operating system’s camera controls, then reopen the streaming application so it recognizes the change.
5. Stop automatic exposure from hunting (5 minutes)
Automatic exposure is useful when lighting changes, but it can create a loop in a dark room: the camera brightens the image, sees a bright light or reflective background, darkens it, and then brightens it again. If your webcam software permits it, turn off auto exposure and adjust exposure manually.
Start near the middle of the available exposure range. Your face should be clearly visible without blown-out highlights on your forehead or cheeks. If manual exposure is unavailable, increase the front light and reduce bright objects behind you. A plain wall is easier for the camera to handle than a window, white lamp shade, or illuminated monitor.
6. Lock white balance and focus (3 minutes)
Auto white balance can make the image alternate between warm and cool when your lighting is weak. Select a preset such as “daylight” or “neutral,” or use a manual setting if available. Keep all active lights close to the same color temperature; combining a warm household bulb with a cool ring light often creates uneven skin tones.
Turn off autofocus temporarily while testing. A webcam may refocus on a dark background, glasses, or moving hands, which can look like flicker even though brightness is not changing. If you need autofocus, keep your face within a consistent distance of the lens.
7. Check the USB connection and app settings (5 minutes)
Plug the webcam directly into the computer instead of an unpowered hub. Try a different USB port and, if possible, a different cable. Disconnect unnecessary USB-powered accessories while testing the camera and light.
In the streaming app, set one camera resolution and frame rate rather than allowing automatic changes. Start with 1080p at 30 frames per second if your webcam supports it. If the image remains unstable, test 720p at 30 fps. Close other programs that may be accessing the camera, then restart the streaming app.
8. Record a short test before going live (4 minutes)
Record 30–60 seconds while speaking, moving slightly, and looking away from the lens. Review the file at full size. Check for brightness pulsing, horizontal bands, focus changes, and shadows that appear when you move.
Make only one adjustment at a time. Move the light, change its brightness, and then retest before changing exposure. This makes it easier to identify what actually solved the problem.
Mistakes to Avoid
- Do not point the webcam at a bright window while your face remains in shadow.
- Do not combine several cheap LED bulbs with different dimmers during troubleshooting.
- Do not run a ring light at full brightness inches from your face.
- Do not choose 50 Hz or 60 Hz randomly; match the setting to your local electrical standard.
- Do not place the light directly behind the webcam if it creates a bright reflection in glasses.
- Do not assume every brightness change is flicker. Autofocus, auto exposure, and unstable USB power can look similar.
How Often
Review the setup whenever you move the desk, change rooms, replace a bulb, or update streaming software. Wipe the webcam lens and light diffuser about once a month with a clean microfiber cloth. Recheck the preview seasonally if daylight enters the room, because the sun’s angle can change the amount of background light significantly.
Before an important stream, allow five minutes for a quick test recording. Confirm the light is powered, the webcam is recognized, and the anti-flicker setting has not returned to automatic.
When to Call a Pro or Replace
Consider professional help if flicker continues with the webcam covered, a stable light disconnected, a different USB port, and a second computer. That pattern points away from room lighting and toward a damaged camera, cable, power adapter, or computer port.
Replace the webcam when its image flickers across multiple computers and under steady daylight, especially if the device is several years old, overheats, disconnects, or shows lines in saved recordings. Replace the light if it visibly pulses, buzzes, becomes unusually hot, or flickers when its brightness is changed. A basic replacement light in the roughly $15–$30 range is often more practical than troubleshooting an unreliable fixture.
FAQ
Why does my webcam flicker only at night?
Nighttime usually removes the steady daylight that helps the camera expose your face. The webcam then raises gain and exposure, making it more sensitive to LED pulse, dimmer circuits, and background brightness changes. Add a stable front light and set the correct 50 Hz or 60 Hz anti-flicker option.
Can a ring light stop webcam flicker?
It can, provided the ring light has stable output and is powered reliably. A ring light will not fix flicker caused by a bad USB cable, a failing webcam, or an incorrect power-frequency setting. Use it as a controlled test light rather than assuming it is the complete solution.
Should I use 30 or 60 frames per second?
Start with 30 frames per second because it is often easier to match with indoor lighting and uses less computer bandwidth. Try 60 fps only when you need smoother motion and your lighting remains stable. Frame rate alone does not correct an incorrect 50 Hz or 60 Hz setting.
Why does my webcam flicker when I move?
Movement can trigger autofocus or automatic exposure, particularly in a dark room. Increase the light on your face, reduce bright objects in the background, and lock focus or exposure if your webcam software allows it. A short test recording will show whether the issue is brightness, focus, or actual electrical flicker.