Key takeaways
- Installing a CPU cooler comes down to five jobs in order: confirm the mounting hardware fits your socket, prepare the processor and thermal paste.
Installing a CPU cooler comes down to five jobs in order: confirm the mounting hardware fits your socket, prepare the processor and thermal paste, attach the cooler with even pressure, connect the fan header, and verify temperatures after the first boot. Done carefully, the whole process takes about twenty to forty minutes for an air cooler and a little longer for a liquid unit.
This walkthrough is for first-time builders and for anyone swapping a stock cooler for a bigger one before a long gaming season. It stays general on purpose, because every cooler maker ships its own bracket system, and the manual that comes in your box overrides anything here when the two disagree.
Gather Tools and Check Compatibility
Before you open the box, spend five minutes on compatibility, since it prevents the most common mid-install surprises. Lay out a small Phillips screwdriver, a lint-free cloth, isopropyl alcohol at high concentration, and a clean surface to work on.
Socket support
Coolers list the sockets they support, such as AM4, AM5, or the LGA families used on Intel boards. The processor socket on your board must appear in that list. Many coolers include several brackets, so make sure you find the one marked for your platform.
Case and memory clearance
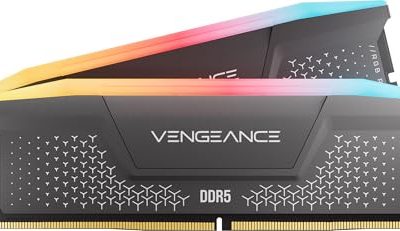
Measure the space between the processor socket and the case side panel, and compare it with the cooler height in the specifications. Tall air coolers can also overhang the first memory slot, so check the cooler description for any note about memory height limits.
Power connectors
Locate the CPU fan header on the board, usually labeled CPU_FAN, near the socket. Liquid coolers usually need a second header for the pump, labeled AIO_PUMP or the same CPU_FAN, so read the manual for your board.
Step 1: Remove the Old Cooler, If There Is One
Power the PC off, unplug it from the wall, and press the power button once to drain leftover charge. Disconnect the fan cable, then loosen the retention screws or push-pins in a diagonal pattern, a little at a time, so pressure releases evenly. Twist the cooler gently before lifting it, because dried paste can bond the base to the processor.
Clean both surfaces. Wipe the old paste off the processor’s metal lid and the cooler’s base using a cloth dampened with alcohol, then let them air dry for a minute. Never pry the cooler off with a screwdriver, and do not pull straight up with force, since this can lift the processor out of its socket on some platforms.
Step 2: Install the Backplate and Brackets
Many aftermarket coolers use a backplate behind the motherboard, which means the board may need to be out of the case or the case must have a back cutout. Place the plate so that its studs poke through the holes around the socket, then thread the standoffs or mounting posts on the front side, finger tight.
Orientation matters. Fan direction, cooler orientation relative to the rear exhaust fan, and how the heat pipes align with airflow all depend on how you set the brackets. The typical goal is to push air from the front of the case toward the back, so the fan should sit so that it faces the rear exhaust.
Step 3: Apply Thermal Paste
If the cooler has pre-applied paste on the base, remove the plastic film and skip to the next step. If not, use a pea-sized dot in the center of the processor lid. The pressure from mounting spreads it. Spreading it by hand is not necessary, and extra paste squeezes out, so more is not better.
- Use only a small amount, roughly the size of a grain of rice to a pea.
- Keep paste off the socket pins and the board.
- If you make a mess, wipe it off and start again, because contaminated paste causes uneven contact.
Step 4: Mount the Cooler
Lower the cooler straight down onto the processor without sliding it. Sliding smears the paste and can create air gaps. Start each screw by hand, then tighten in a cross pattern, a few turns at a time, until all of them reach the stop or the spring pressure is fully compressed. Over-tightening is rarely an issue with spring-loaded screws, but never force one that is binding.
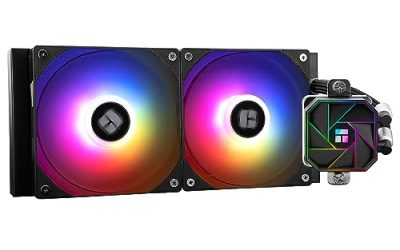
For liquid coolers, mount the radiator to the case after the pump block is secured, with the tubes positioned so they do not kink. Positions that keep the pump at a higher point than the radiator’s highest section help the system avoid trapped air, so check the manual for the recommended layout in your case.
Step 5: Connect Fans and Cables
Plug the fan into the CPU fan header and route the cable away from blades and heat pipes. Add small zip ties to hold things in place. If the cooler includes RGB lighting, connect it to the lighting header or its included controller, and confirm which header type the board uses so you do not plug a mismatched connector into it.
Step 6: First Boot and Temperature Check
Enter the firmware setup at the first boot and look at the processor temperature and fan speed readings. An idle temperature that climbs steadily or jumps to a high value within seconds suggests the cooler is not making contact. Shut down immediately and re-seat it.
Install a monitoring utility in the operating system, then run a demanding game or a stress test for several minutes while watching the numbers. Compare the readings with the processor maker’s stated maximum. A noticeable drop compared with the stock cooler is the usual result when a larger cooler is mounted correctly.
Cooler Type Comparison
| Cooler type | Install effort | Main trade-off | Good fit for |
|---|---|---|---|
| Stock cooler | Low | Louder under load, limited headroom | Light gaming and general use |
| Tower air cooler | Medium | Height and memory clearance | Quiet, steady cooling for most builds |
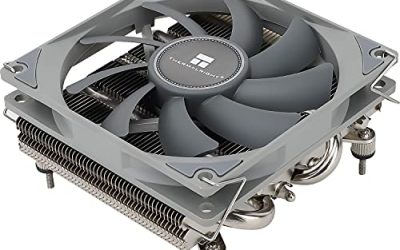
| Low-profile air cooler | Medium | Lower cooling ceiling | Compact cases |
| All-in-one liquid cooler | Higher | Radiator and tubing placement | High-end processors and clean looks |
Before You Start Checklist
- Confirm the cooler lists your processor socket.
- Check cooler height against the case and memory clearance.
- Gather screwdriver, alcohol, cloth, and thermal paste.
- Read the cooler’s printed manual once before you open the case.
- Unplug the PC and touch bare metal on the case to discharge static.
Troubleshooting After Installation
Even a careful install can leave you with a few oddities on the first day. Use the notes below to sort out what is normal and what needs another look, and keep in mind that most problems trace back to mounting contact or fan control.
Fan noise is louder than expected
A ramping fan on boot is normal. If the noise stays high at idle, open the firmware fan settings and choose a quieter curve. Make sure the fan is on the header that the board uses for processor control, since a fan on a case header may not respond to temperature.
Temperatures spike during short tasks
Modern processors boost quickly, and a short burst of heat on opening a game is not unusual. What matters is the sustained temperature after several minutes. If it settles in a sensible range, the mount is fine. If it keeps climbing, reseat the cooler and check the paste layer.
Rattling or vibration
Check that the fan clips are fully seated and that no cable touches the blades. Tighten loose brackets, and consider rubber pads on the fan frame if the cooler supports them. Rechecking the install once a few weeks later in 2026 or beyond is wise, since thermal cycling can loosen screws slightly.
Related guides
- Hall Effect Vs Potentiometer Controller Sticks Explained
- Low Profile Cpu Coolers For Small Form Factor Pcs
- How To Transfer Nintendo Switch Data To A New Console
Frequently Asked Questions
How much thermal paste should I use?
A small pea-sized dot in the center is enough for most processors. Mounting pressure spreads it across the lid. Too much paste can squeeze out and reduce cooling or make a mess near the socket.
Do I need to replace thermal paste when I reinstall a cooler?
Yes. Old paste has already been compressed and may contain air pockets or dust. Clean both surfaces and apply fresh paste each time the cooler is removed.
Which way should the cooler fan face?
Most builders point the airflow toward the rear exhaust fan or toward the top of the case, so heat leaves in the same direction as the case airflow. Follow the cooler manual and your case layout.
Why are my temperatures high after installing a new cooler?
Common causes include uneven mounting pressure, protective film left on the base, too little or too much paste, or an unplugged fan. Power down, re-seat the cooler, and check the fan header connection.
FAQ
How much thermal paste should I use?
Do I need to replace thermal paste when I reinstall a cooler?
Which way should the cooler fan face?
Why are my temperatures high after installing a new cooler?
More from Amazon
Programs that pair well with the guide above. Offers and eligibility are set by Amazon and may change.
Free shipping on eligible items, Prime Video and more. Eligible new members can start with a free trial.
Start a Prime free trialAd-free music streaming. Eligible new subscribers can start with a free trial.
Try Music Unlimited freeA Prime membership for ages 18-24 with a trial period. Eligibility is set by Amazon.
See Prime for Young AdultsAudiobooks and podcasts to listen to on the go. Eligible new members can start with a free trial.
Try Audible freeAs an Amazon Associate we earn from qualifying purchases.