Key takeaways
- Cooler height: Compare the cooler’s total height with the maximum listed for your exact case version. Leave a little room for panel fit; do not force a glass or mesh panel against the cooler.
- Front-to-back direction: Orient a tower cooler so its fans generally move air from the front intake toward the rear exhaust. Reversed airflow can oppose the case’s main cooling path.
- Radiator position: Confirm radiator length, thickness, fan thickness, and tube routing together. A radiator may fit by length but collide with memory, motherboard heatsinks, or the top panel once fans are included.
- Socket pressure: Tighten mounting screws gradually in the sequence specified by the cooler maker. Uneven pressure can impair contact; overtightening or improvised spacers can damage components.
- Port access: Before the cooler blocks the board edge, connect CPU power and any fan or pump leads that will be awkward to reach afterward.
The best CPU mount for the Fractal Design North case is usually no aftermarket mount at all: the North’s CPU socket is on the motherboard, and the case does not support a separate bracket that relocates a CPU. If you mean a CPU cooler mount, choose the mounting hardware made for your cooler and CPU socket; if you mean a vertical GPU mount, check the exact North version, card thickness, and cooler clearance before buying.
First, clarify what “CPU mount” means
“CPU mount” can refer to three different parts: a cooler’s socket bracket, a case-mounted CPU holder, or a vertical GPU bracket mistakenly described as a CPU mount. The North has no dedicated case feature for mounting the processor itself away from the motherboard. The processor must remain installed in its socket, and its cooler attaches to the motherboard using socket-compatible hardware.
That distinction matters because the North’s airflow and dimensions do not make a cooler bracket interchangeable with a GPU riser. A bracket can be physically close to fitting and still interfere with the side panel, fans, or access to motherboard connections.
Compatibility at a glance
| What you want to mount | Best-fit choice | North-specific check |
|---|---|---|
| CPU air cooler or liquid-cooling block | The cooler’s supplied bracket for your exact socket | Confirm case cooler-height or radiator support, then check RAM and motherboard heatsink clearance |
| Vertical graphics card | A case-compatible vertical GPU bracket and PCIe riser | Compare card thickness and depth with the side panel, power connectors, and available expansion slots |
| CPU mounted outside the motherboard | Not supported as a normal North case installation | A processor cannot be relocated from its socket using a case mount |
Choosing a cooler mount for the North
For a conventional build, use the mounting kit supplied with the CPU cooler. Check that it supports your processor’s socket—such as AMD AM5 or Intel LGA 1700—and follow the cooler maker’s instructions. If the cooler is used or missing parts, obtain the correct replacement kit from its manufacturer; do not substitute a bracket based only on matching screw spacing.
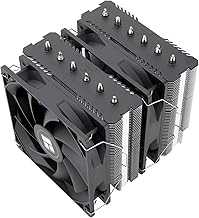
The North’s layout rewards a cooler that preserves clear airflow from the front intake fans toward the rear exhaust. A large tower cooler can work well, but its height must stay within the limit for the specific North variant. The standard North and North XL do not have identical dimensions, and mesh and glass configurations can differ in practical component clearance. Check the manual for your exact model rather than assuming a listing for another North applies.
Also check the motherboard and memory before installation. A cooler’s front fan may overhang tall RAM, while a broad heatsink can crowd the top edge of the board or make the EPS power connector harder to reach. Connect the CPU power cable before fitting a bulky tower if your fingers would otherwise be blocked.
Clearance and airflow checks that save a rebuild
- Cooler height: Compare the cooler’s total height with the maximum listed for your exact case version. Leave a little room for panel fit; do not force a glass or mesh panel against the cooler.
- Front-to-back direction: Orient a tower cooler so its fans generally move air from the front intake toward the rear exhaust. Reversed airflow can oppose the case’s main cooling path.
- Radiator position: Confirm radiator length, thickness, fan thickness, and tube routing together. A radiator may fit by length but collide with memory, motherboard heatsinks, or the top panel once fans are included.
- Socket pressure: Tighten mounting screws gradually in the sequence specified by the cooler maker. Uneven pressure can impair contact; overtightening or improvised spacers can damage components.
- Port access: Before the cooler blocks the board edge, connect CPU power and any fan or pump leads that will be awkward to reach afterward.
If you meant a vertical GPU mount
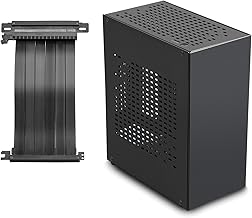
A vertical GPU bracket is a different purchase. It holds the graphics card in the case’s expansion-slot area and connects it to the motherboard through a PCIe riser cable. It does not mount the CPU. For the North, the main trade-off is appearance and presentation versus space and cooling: placing a card close to a side panel can restrict its fans’ intake, particularly with a thick GPU or a glass-sided configuration.
Before choosing a bracket, verify that it is designed for your North case version and that its mounting position does not block the card’s power connectors or prevent the side panel from closing. Check the GPU’s thickness, length, and connector location—not just the bracket’s advertised slot count. Leave room for the power cable to bend without pressing against the panel.
A riser also adds a connection between the motherboard and GPU. Use a quality cable with the appropriate PCIe generation and set the motherboard’s PCIe link mode to the riser’s supported generation if the system does not boot reliably. A black screen, intermittent detection, or failure to wake can point to a riser signal or seating issue; reseat both ends and test the card directly in the motherboard before blaming the GPU.
Decision matrix: which setup fits your build?
| Your situation | Recommended approach | Why |
|---|---|---|
| Building a standard gaming PC | Use the CPU cooler’s socket-specific mount | It keeps the processor correctly seated and avoids unnecessary case hardware |
| Using a large air cooler and tall memory | Check RAM clearance and fan adjustment before installation | Raising the fan can increase total cooler height and affect panel clearance |
| Using a top radiator | Measure the complete radiator-and-fan stack against board and memory clearance | Nominal radiator support alone does not guarantee clearance at the motherboard edge |
| Wanting a vertical graphics card | Use a bracket confirmed for the exact North version and GPU dimensions | Panel distance, card thickness, and riser compatibility determine whether it is practical |
| Trying to move the CPU away from the motherboard | Do not buy a case mount for this purpose | The CPU must remain in its motherboard socket |
Installation sequence for a cooler mount
- Identify the case and socket. Read the case label or manual to confirm North, North XL, and the panel type; identify the CPU socket from the motherboard specifications.
- Confirm all clearances. Check cooler height, radiator and fan thickness, RAM height, and motherboard heatsink position. Treat each measurement as a separate constraint.
- Prepare the board. Install the correct backplate and standoffs using the cooler instructions. Keep the motherboard’s original backplate if the cooler design requires it.
- Apply thermal paste and seat the cooler. Use the paste amount and screw-tightening pattern specified by the cooler maker. Avoid twisting or forcing the assembly.
- Connect fans and pump, then check access. Verify CPU_FAN or the specified pump header connection, confirm cables cannot touch fan blades, and test-fit the side panel before powering on.
Bottom line
For the “best CPU mount for fracta design north case” search, the safe answer is a socket-compatible CPU cooler mounting kit—not a case-mounted CPU holder. The North’s airflow favors a front-to-rear cooler path, while its exact height and radiator limits depend on the case variant. If you actually want to mount a graphics card vertically, choose a North-compatible GPU bracket and check panel clearance, card thickness, riser support, and cable access as a complete system.